Remember those paper fans you used to make as a kid? Pretty simple, right? Just fold the paper back and forth back and forth, pinch at one end and you have a fan! This little technique has been refashioned into the fan wheel, and has been making the rounds at weddings, showers, birthday parties, you name it. It’s an easy way to add a touch of color and retro modernism to any event.
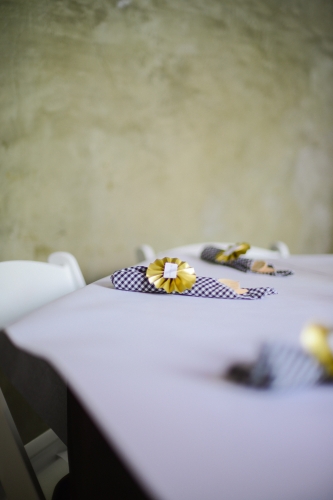
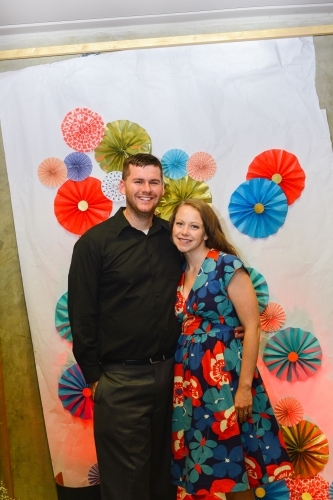
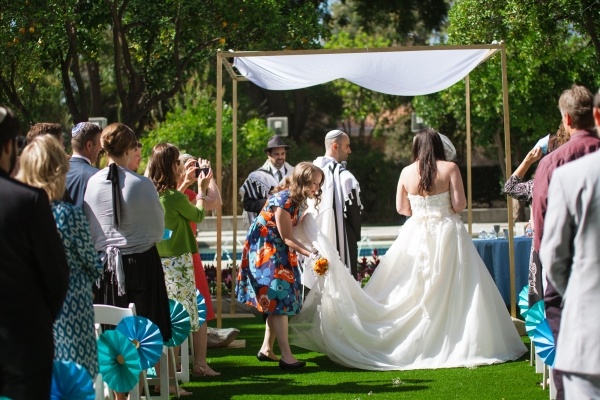
I recently made these fan wheels for my wedding. We used them on everything from the aisle decorations, to the photo backdrop, to the table numbers and even the napkin rings. You can even see them lining the aisle of the ceremony!
What you will need:
Scissors
Paper of your choice
Hot glue gun
Any other accoutrements to assist you in what you are creating (For example, I used rubber bands to attach to the back of the fan wheels for napkin rings.)
Directions:
1. Cut your paper in rectangles, whatever size you would like in 4:1 ratios (i.e. 12” x 3”).
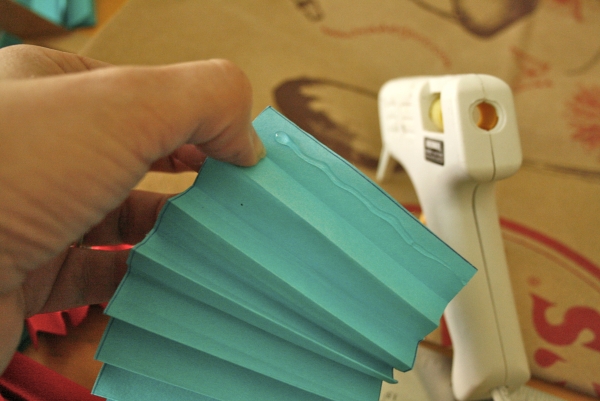
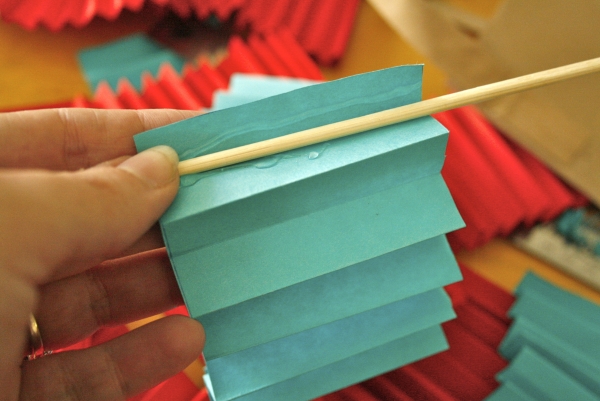
2. Starting from the narrowest side, fold from the end upwards (if your paper is 12” long, the fold should be about ½”; if your paper is 24” long, the fold should be about 1”). Flip the paper over, and fold from the end upwards. Flip over again, and fold again doing this until you have reached the end of the paper, creating an accordion fold.

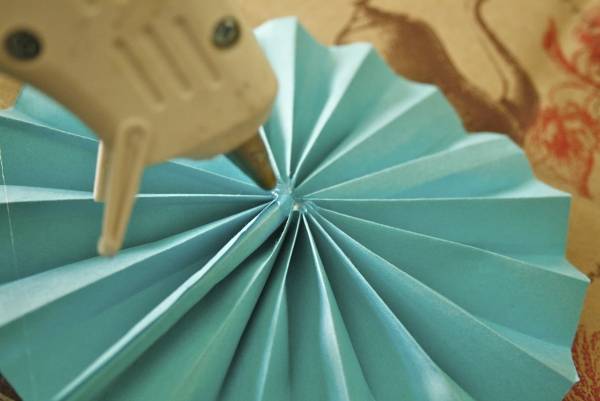
3. Taking two of your folding papers, glue the ends together. Open up the paper like a fan and glue the other two ends together so you have created a circle.
4. If you wanted to place a dowel in the fan so you can stick in a flower pot or a cake, here's where you would do it.
5. Place hot glue in the center of the fan wheel to keep it together and hold tight for about a minute until the glue dries.
6. That’s it! You’ve made a fan wheel! You can dress it up by adding a dowel to the center to make it into a sign, punch holes in the top to hang it, or simply tape/glue several onto a large piece of parchment creating a design.
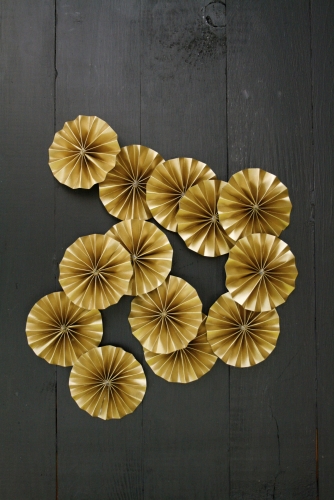

It’s a simple detail that can bring all the other details of your party together, leaving a lasting impression on your guests for weeks to come.

(Credit for wedding photography: Live Your Life Photography)

Comments